When you start your own furniture making business it is usually because you are a good craftsman who wants to make furniture for a living. The problem of being good at it is that you end up running a business rather than doing what you initially set out to do.
One of the benefits of lockdown and covid was that almost all meetings and therefore the requirement to travel to London ceased overnight, which freed up a huge amount of time to do other things and I was able to undertake some prototyping and helping the workshop to progress projects.
Work throughout the pandemic period has been incredibly busy with the result that we have had to turn away work, which is always disappointing. When we were approached by William Grant through a long-standing client to manufacture two boxes for the One-of-One auction of unique whisky I had the choice to say no or clear my desk and make them myself as we were already working at full capacity.
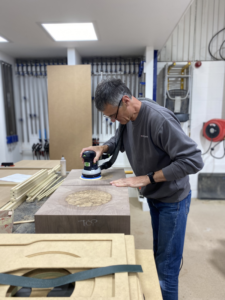
Having not really worked properly in the new workshops I approached the task with some trepidation as much of the equipment we have now is considerably more complex than when I started, just finding the on button for the sander is confusing enough.
There is a great satisfaction in creating a piece from scratch and I found the whole exercise incredibly rewarding and also very tiring as I had not spent a full week on my feet for some considerable time.
The other unexpected benefit was that a large number of the staff who had joined in recent times had no idea that I was actually a trained craftsman, and it has been great to engage with them at a craft level.
PART 2
The two whisky boxes are entirely different with one in American black walnut and the other in black stained sycamore. In this section I will be discussing the challenges of making the second box.
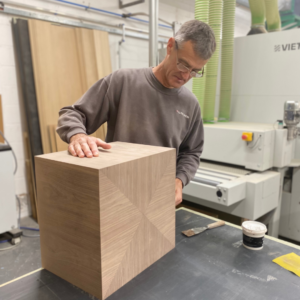
 My preference when making a box is to assemble a cube and then cut it so that veneers flow accurately through and the parts are exactly the right size. This is relatively simple with a two-part box as you only have to allow for the width of a saw cut but with a three-part box you cannot cut one of the halves in two as you lose too much material to achieve a quality gap between the two doors. I also prefer solid lippings under the veneer rather than veneer lippings on the edge. This means that you have to insert a solid piece timber within the box material so when you cut through the box you get a solid lipping left on both sides. We have already discussed that you cannot do the same with the second cut to form the double doors but we still want a solid lipping. You can achieve this be lipping the door material first and then gluing the door pieces together with paper in the join before gluing those pieces to the main parts of the box. As an added complication at this stage, you can also insert magnets under the surface to provide a hidden closing system.
Having now prepared the base material we need to veneer the parts before machining the mitres on each edge. This box required a v to be formed from the top corners to the middle of the front and back and that the veneer would be vertical in uniform slip matched strips with the veneer running up the front, across the top and down to form the rear v. The section below the v had slip matched strips again running parallel to the v on both sides and then running horizontally along the sides before returning back along the v on the rear. This has an added complexity as the width of the strips that run on the angle are different to the matching strips that run across the sides.
Having now prepared the veneer lay-ups these need to be accurately glued to the box pieces so that when the box is glued up all the strips line up and the veneer joints line up with the corners. The veneer can move when being handled into the press and also when the pressure is applied to the panels. To alleviate this the panels, need to be accurately marked so the veneers can be accurately placed on each board when the glue has been applied. To reduce slippage, we used a stiffer glue mix and taped the lay-ups onto the boards.
Having successfully negotiated the veneer application we then had to mitre all the panels and then glue them together to form a cube. Once dry the first cut can be made to part the box body from the door sections. The two doors are separated by breaking the paper joint between the two lippings but before doing so we run a scalpel through the veneer joints and a very fine saw through the solid lipping.
At this point most of the really tricky operations have been completed and we can start on the interiors.
